
This plugin series lets the player freely tamper with the terrain according to your rules no matter you want to establish buildings, use it as a furniture system, or as a base for a farming sim!
Event Spawn System included!
Features
- Let the player freely modify the terrain according to your rules.
- Define „Blueprints“ including information such as: What can be built, where it can be built, costs, etc.
- The plugin manages Autotiles and shadows, so you don’t have to deal with them.
- Event Spawn System included!
- An excellent build menu that automatically renders your assets (so you don’t have to take pictures for all of them).
- Mouse and Touch Support!
- Define preconditions such as materials, required gold, switches, …
- Define post-build events such as flipping a Switch or running a Common Event.
Trial Version
This plugin offers a free trial version. This is the perfect chance for you to try it out and check whether this plugin works with your current project. It provides all the features from the full version; however, it comes with some limitations:
- Map changes are not memorized. Changing map, loading a save, or opening the menu leads to map changes being wiped.
Import Plugins and unlock to Full Version
Import these plugins and order them by the „Tier“ tag.
- MK_MapManipulation
- MK_SpawnEvents
- MK_SandboxEngine
- MK_BuildMenu
- MK_SandboxEngine_Unlocker (comes with the full version)
Get Started
We recommend opening the sample project that comes with your download (It doesn’t matter whether you downloaded the free trial or already purchased the full product).
Source Maps
Everything that the player can build is defined on so called „Source Maps“. Prepend the ! or $ symbol to a map name so the plugin knows that it should preload these maps.
- When using ! the plugin loads this map when it’s a child map of the map where the player is right now.
- When using $ the plugin loads this map on game start, so it is always available.

As you can see, you can pre-load multiple source maps as long as they don’t share the same name.
Anatomy of a Source Map
Example:

A source map contains at least one row („asset“) which consists of the following:
- Region tiles are used to fulfill two purposes: Define the dimensions of an asset and assign it to a number. You can use any number as long as you don’t use a number twice within one source map.
- At least one „matcher“: Those matchers define where this asset can be built later, e.g., floor, carpet, walls, …
- Exactly one blank area with the size of the region tiles.
- Exactly one asset: This is what will be built in the game. It may contain events.
Blueprints
A blueprint wraps up an asset and extends it with additional information such as name, category, costs to build, and more. You define them in the plugin manager.
- Name: Unique name to identify every blueprint.
- Category: Optional. The build menu can filter by category.
- Description: The player will see what you type in here.
- Sourcemap Name: The name of the source map. You can skip the !/$ symbol.
- Region ID(s): Region ID of your asset on the source map. When you type multiple values, the plugin will always look for the first asset that matches the location where the player is pointing
- Required Items: Items that the player needs to build this object. Those items are consumed automatically when building.
- Required Gold: Same as „required items“ but for gold.
- Conditions:
- Switch: When given, this switch must be switched to ON.
- Variable: When given, this variable must be larger or equal to the number from the next parameter.
- Custom Code: You may use custom code to add your own pre-condition.
- Post Build Events: Here you can define some events that should happen after the player built something.
- Initially available?: When true, the player knows about this blueprint already on game start.
Learn and Forget Blueprints
You can choose from two ways to manage blueprints in your game. Choose as you prefer.
Via Note Tags

Add <Blueprint: x> to items in the database. As long as your party owns it the player can use this blueprint.
Via Commands
MZ users: You can use plugin commands to add/remove blueprints.
MV users: You can use these scripts:
$gameParty.learnBlueprint("table")
$gameParty.forgetBlueprint("table")
Build Menu
This suite comes with a build menu that lets the player choose what to build next. But, of course, you can use something else to manage building.

Shovel Mode
When the shovel mode is enabled then the player can transform the map right ahead of them while moving freely. That works best when the asset is a 1×1 tile.
When the shovel mode is disabled then the player is locked at their position, and the asset is positioned by mouse or arrow keys.


building by arrow keys/mouse
To control the shovel mode, you can use Plugin Commands (MZ only) or these script calls:
MK.Sandbox.setShovelMode(true)
OR
MK.Sandbox.setShovelMode(false)
Energy/Stamina
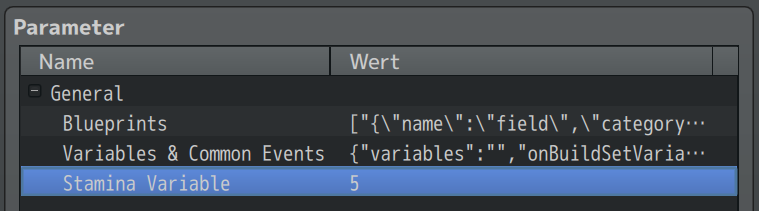
You can set stamina costs for each blueprint. To enable the stamina system, you must bind the stamina to a Game Variable in the Plugin Manager.
Then, you can define stamina costs for each blueprint in the blueprint section of the Plugin Manager.
The plugin will now do the following:
- The build menu shows the required stamina vs. the player’s stamina
- The plugin checks whether the player has enough stamina to build the selected blueprint
- If not, then a Common Event can be started (usually to show a message „not enough energy!“)
- The plugin decreases the Game Variable by the stamina costs
The plugin does not set or refill your Game Variable at any time, nor does it check whether your Variable is above any limit or drops below 0. It’s up to you to initialize this Variable at game start and also to refill it (maybe when the player rests, gains energy over time, there are many possibilities …).
Putting everything together
We believe that such a plugin should not dictate gameplay rules and instead the game designer should have full control. This means that the plugin does not automatically display buttons or register hotkeys for certain functions. Instead, it offers several interfaces.
To get started, we recommend downloading and opening the demo project. Consider it a suggestion, not a requirement. It is likely that you would do some things differently.