This article explains the procedure for version 3.0
In this tutorial, we build our first random dungeon using the „Snippets“-technique.
Snippets
The idea is to pre-define Snippets, which this plugin will randomly connect to create appealing dungeons to explore. A snippet is a fundamental base element of the resulting maze, in detail: straights, turns, dead-ends, T-forks, and one crossing.
First, let’s decide the size of all the Snippets. In this example, we will use 7 for both width and height.
Create a new map.
- Call it Snippets (exactly this name)
- The width and height are computed by
(4 * snippet's width/height) + 5
In our example, that’s 33 for both width and height - Pick the Tileset of your choice
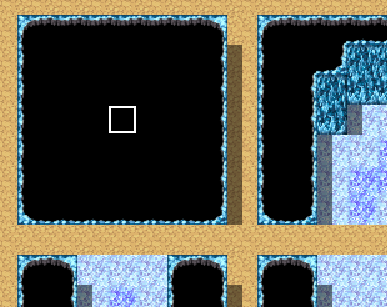
Draw something like this:

However, you are free to draw whatever you wish. For example, it is not required for the blank tile to be completely black. When designing a forest, it could be nice to use grass here, which is passable for the player.
Tips!
- The water tiles help you to frame your snippets. You can use any tile here; just pick one with a high contrast.
- This plugin uses functions to fix autotiles, so you don’t have to worry about them.
- The same goes for shadows; they will be automatically erased when the map is generated.
Why is only a single floor tile used?
Yes, we keep the floor simple.


We will do the darker floor tiles later.
(Optional) Alternative Snippets

Optionally, you can create multiple Snippet Maps to get some more variety. Simply append a number to the map names.
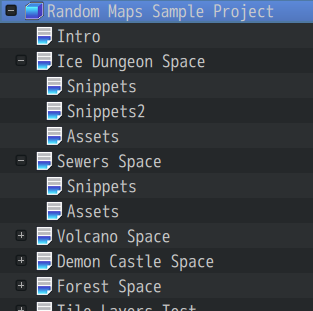
Space Map
Create a new map with these settings:
- You can give it any name, e.g. Ice Dungeon Space
- Use the same Tileset as in the Snippet Map.
- Keep Width and Height as they are. The plugin will programmatically adjust these values for you.
- Feel free to choose BGM, display name, encounters, …

Confirm and close this dialog.
Fill this map with the black Tile you used in your Snippet on the top left.

Entrance, Exits, Events, and Other Objects
Create a new Map.
- Call it Assets (exactly this name)
- Choose the same Tileset as before
In this map, we define an entrance and an exit, gameplay-related objects like mobs, chests, switches, keys, and decorative objects.
Let’s have a look at this example:
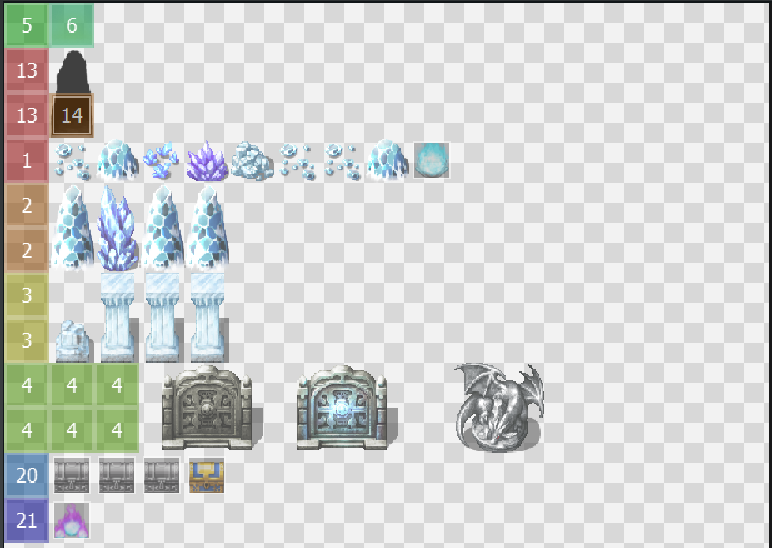
Let’s break it down, row by row. Each one consists of:
- Region Tiles on the left. Please ignore the 6 on the top, we come back to this later. The Region Tiles have these purposes:
- They assign each row a unique number so we can easily refer back to them later.
- They define the width and height of their corresponding object.
- At least one object. That could be anything like regular Tiles or Events. When you put more than one object, the plugin picks randomly every time.
Entrance and Exits
The entrances and exits have a unique role. First, the plugin sees no difference in entering or leaving the generated map. From now on, the entrance and the exit(s) are treated the same.
For our first dungeon, we pick 2: The southern one where the player will spawn and the northern one where the player continues their expedition. Draw something like this:

Feel free to choose a different width or height, e.g., having a larger door. When you don’t want to visually emphasize where the player spawns, you can keep this tile blank.
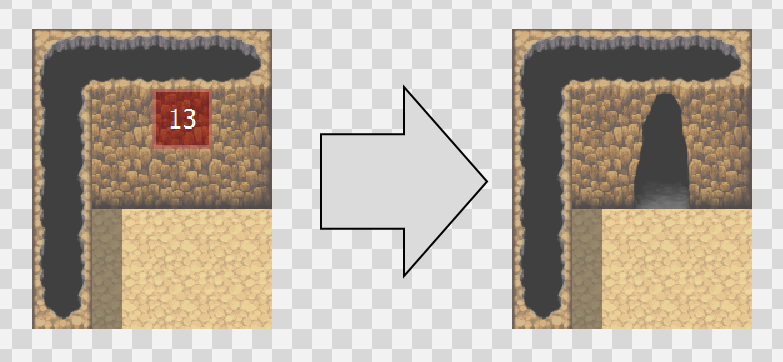
You can have up to 4 exits, one in each direction (north, west, east, south). Each exit has its reserved Region ID that you can look up:
| North | 13 |
| East | 15 |
| South | 5 |
| West | 8 |
Spawn Locations
All exits must have a Spawn Location defined. This is required so the plugin knows where the player should spawn exactly. A Spawn Location is a single Region Tile with a specific ID.

- 6: Southern Spawn Location
- 14: Northern Spawn Location
- 9: Western Spawn Location
- 16: Eastern Spawn Location
Tip: Slightly move the Spawn Location
It usually looks more appealing when the player spawns one tile below the door.
Decorative Assets
Now, you can define more decorative objects.
By default, you can use Region IDs from 1, 2, 3, and 4. All of them are optional.
How can I add new rows?
You can use any other Region ID. To add or change Region IDs go into Templates/Plugin Manager.
Monsters, Chests, and other Gameplay-related Objects
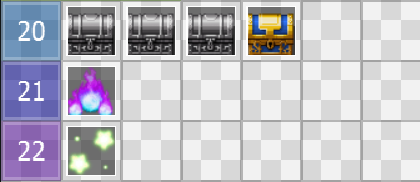
As you can see in the screenshot above, you can add gameplay-related objects. By default, this plugin offers you 3 reserved IDs:
- 20: loot chests
- 21: mobs
- 22: a single switch (e.g. for puzzles)
All of those are optional. You can simply skip chests, enemies, or any other set.
How can I change the number of spawns or add new assets?
You may use any other Region ID. To add or change Region IDs or to change the number of times an object spawns, go into Templates/Plugin Manager.
Region IDs
Below is a table of the default Region IDs and their function.
Some Region IDs are reserved for special functions. You may change them in the Plugin Manager („RNGMaps“, and in the Templates inside of „RNGMaps_withSnippets“).
| Region Id | Description |
|---|---|
| 5 | Southern Exit |
| 6 | Southern Spawn Location |
| 13 | Northern Exit |
| 14 | Northern Spawn Location |
| 8 | Western Exit |
| 9 | Western Spawn Location |
| 15 | Eastern Exit |
| 16 | Eastern Spawn Location |
| 1 – 4 | Decorative Objects |
| 20 | Chests |
| 21 | Enemies |
| 22 | Switch (e.g. for Puzzles) |
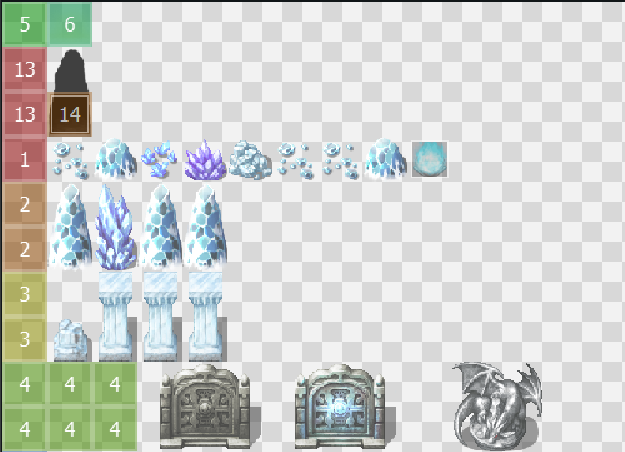
Multiple Assets in one Row

As you can see, you can always put more than one object in one row. You can also duplicate objects to easily make ratios. In this example, it’s more likely that a grey chest appears rather than the blue one.
Can I put empty objects on purpose?
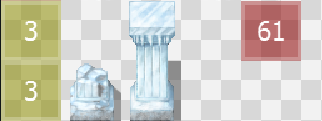
By default, the plugin scans for the last asset of a row. You may use the Stopper Region ID (61 by default, which can be changed in the Plugin Manager) to tell the plugin where it should stop scanning. That is useful when you want to allow an asset to not spawn at all.
Put Region Tiles on the Snippets
By putting Region Tiles on your Snippets, you define where objects spawn.
Let’s go through all the different asset types. I recommend you to start with the exits first.
Exits
Exits have special rules. The plugin needs to be able to spawn all mandatory exits; otherwise, your player cannot spawn correctly or find an exit to escape from your dungeon.

Common Objects
You can put all the other objects anywhere on the Snippets, even on the blank one; just don’t block the player.

(Optional) Shadings
This feature automatically draws alternate floor tiles, usually the darker ones, on the resulting map. Create a Map.
- Call it Shadings (exactly this name)
- Choose the same Tileset
Draw this:

Draw the regular floor tile on the left and the alternate one on position (2, 0).
Map Arrangement
Now that we have all the required Maps, we need to arrange them. All we have to do is make the Space Map the parent map of the maps we created in this tutorial. As soon as the player enters the Space Map, the plugin scans and loads its child maps.