| License | free & paid version |
| Supported Engines | RPG Maker MV* & MZ |
| Status | Released |
* Please read: Limitations when using RPG Maker MV
Features
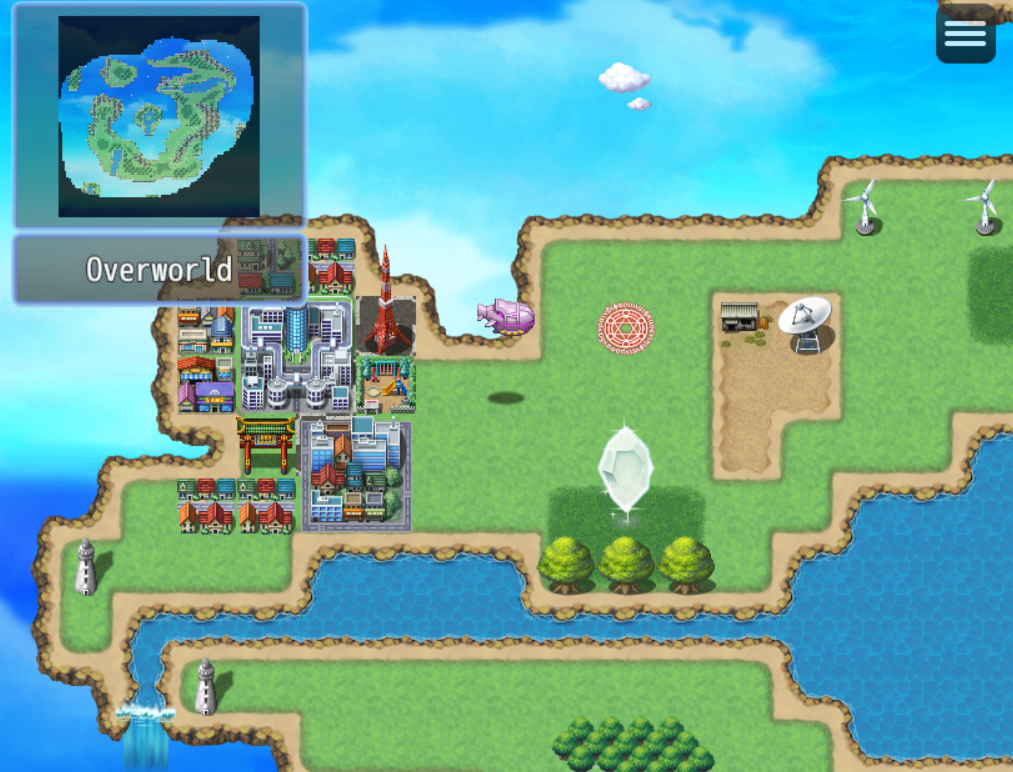
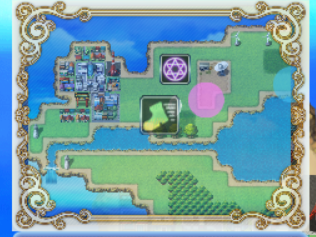
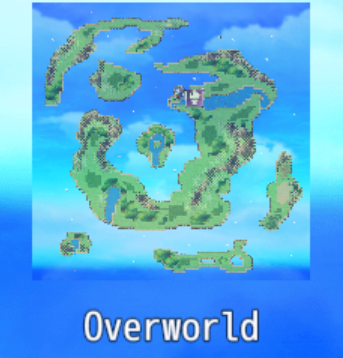
This Minimap was designed by analyzing and replicating the RPG Maker’s code to automatically draw the map with its terrain on the UI.
- The player, vehicles, and every event can be rendered as Icon, Picture, Dot, Square, or their Sprite. Useful to highlight important NPCs or points of interest.
Followers are not displayed. - Players, vehicles, and events can blink on the Minimap.
- Customization:
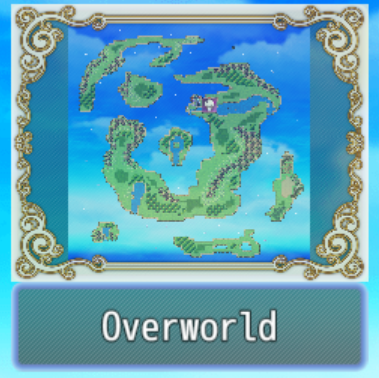
- Background: You can choose from „Window,“ „Picture,“ or no background
- Foreground: You may set a Picture as a custom foreground
- Position and Sizes: Can be individualized
- Fog of War. The fog of war is persisted in the game saves. It can be enabled/disabled for every map individually.
- Vehicles and selected Events can break through the fog of war, making them visible even when the player hasn’t discovered their location yet.
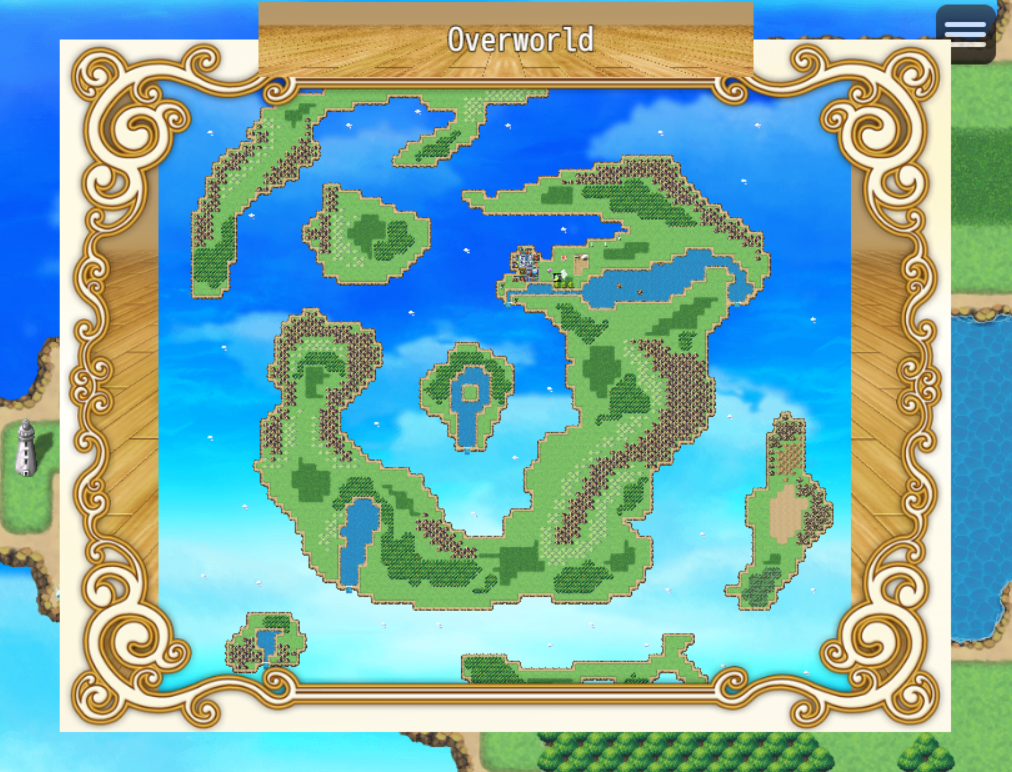
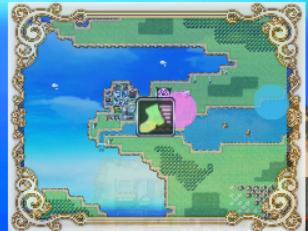
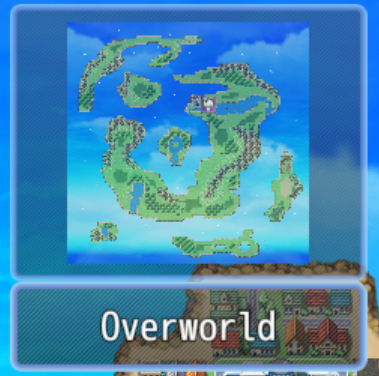
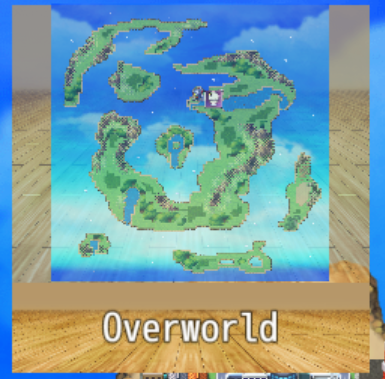
- Zoom. The Minimap can show the full map or zoom in. Vehicles and Events that are too far away from being seen can stick on the Minimap’s edge to give the player some orientation.
- Map Name Window. A new window is added right below the Minimap. It is designed to display the map’s name, but it can be customized with JavaScript to display anything you need or to not appear at all.
This window replaces the RPG Maker’s default map name window (optional). - The Minimap can be expanded to fullscreen and collapsed by pressing a hotkey or by clicking on the Minimap itself.
- The Minimap can be shown or hidden anytime, e.g. when starting a cutscene.
- The player may disable the Minimap in the options menu.
Lite Version & Standard Version
There exist two versions.
The Lite version comes with the bare minimum and is available for free. You may include this version in any kind of game, both free and commercial.
The Standard version comes with all the features described on this page.
| Lite | Standard | |
|---|---|---|
| Display the Minimap | ✓ | ✓ |
| Set Minimap Position, Width & Height | ✓ | ✓ |
| Hide Minimap via Notetags, Commands, etc. | ✓ | ✓ |
| Enable/disable the Minimap in the Options Menu | ✓ | ✓ |
| Hotkeys | ✓ | ✓ |
| Render Options for the Player, Vehicles, and Events | Sprite only | Sprite, Icon, Picture, Square, Dot, hidden |
| Minimap Background | Window, none | Window, Picture, none |
| Minimap Foreground | ✓ | |
| Minimap Map Parallax | ✓ | |
| Expand Minimap to Fullscreen | ✓ | |
| Zoom | ✓ | |
| Fog of War | ✓ | |
| Map Name Window | ✓ | |
| License | Free | Payed |
Limitations when using RPG Maker MV
Some features are not (yet) supported when using RPG Maker MV:
- The Minimap will not expand nor collapse when clicking on it via mouse or touch device. It will work by pressing the hotkey on the keyboard, though.
Quickstart
Use this plugin parameter to define whether the Minimap is shown by default or not.
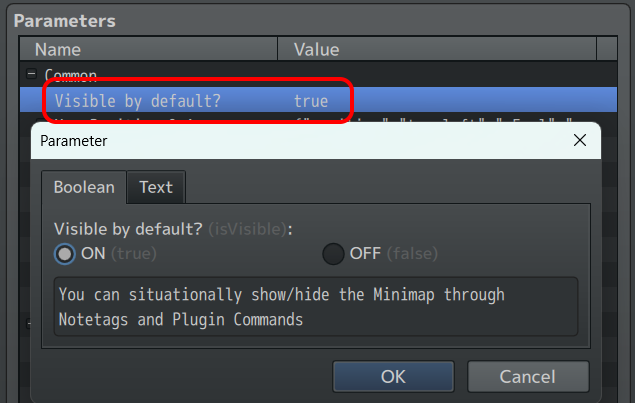
As already explained in the editor, you can situationally show or hide the Minimap.
The player may decide to disable the Minimap in the Options Menu.
Map Notetags
You can use these notetags on Maps to override the default value.
Show Minimap
<Minimap>Not show Minimap
<No Minimap>Plugin Commands
You can use plugin commands to show/hide the Minimap situationally.
MV users, please refer to the JavaScript section.
Force Show
You, as the game developer, can force the Minimap to show regardless of the player’s setting in the Options Menu. „Force show“ is either enabled or disabled. It is a simple yes-or-no feature.
MV users, please refer to JavaScript -> Force Show.
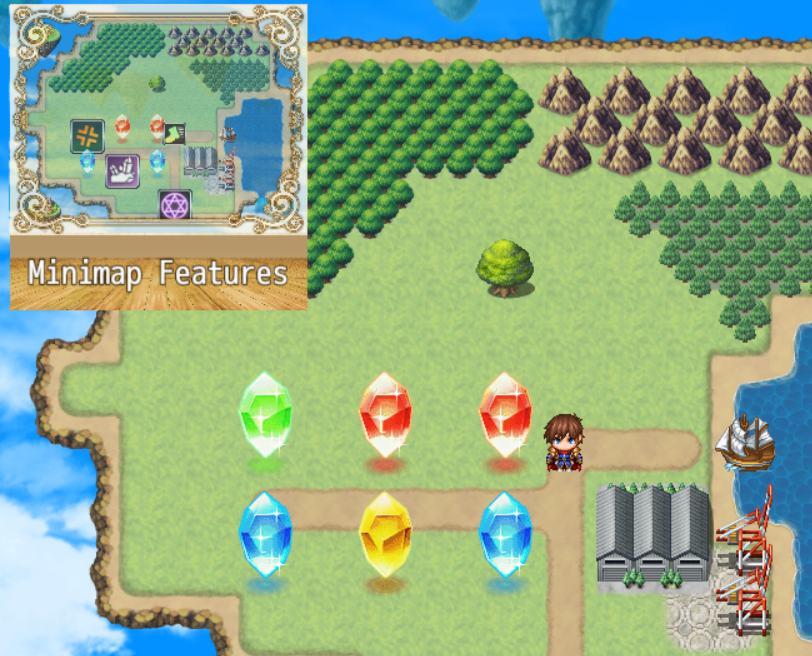
Event Templates
This feature is exclusive to the standard version of this plugin.
This plugin uses Templates to define how Events should be rendered on the Minimap. To view and manage templates, go to the Plugin Manager –> Event Templates.
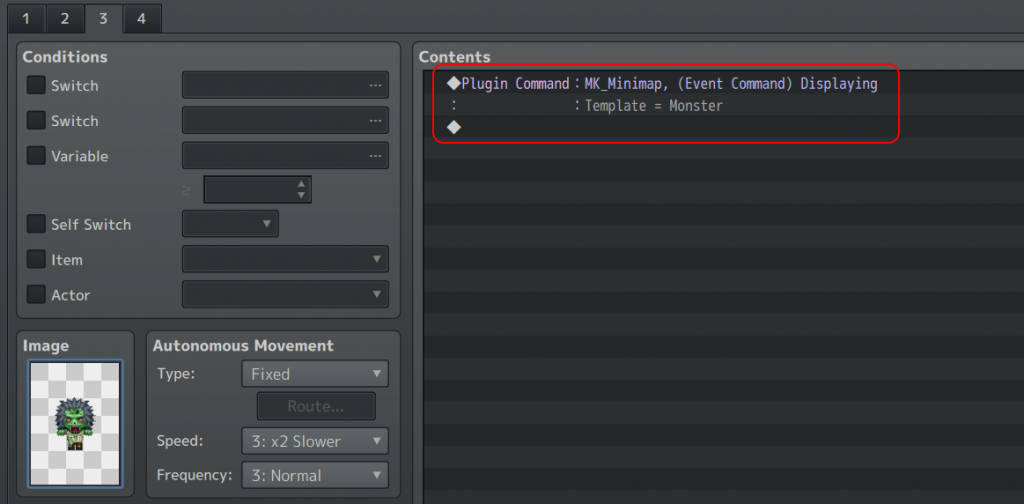
MZ: Apply Template to an Event
To apply a Template to an Event:
- Open the particular Event
- On the Event command list, add a Plugin Command.
- In this Plugin command, select „(Event Command) Displaying“ and choose a Template.
Note: Only the active Event Page is scanned for this Plugin Command.
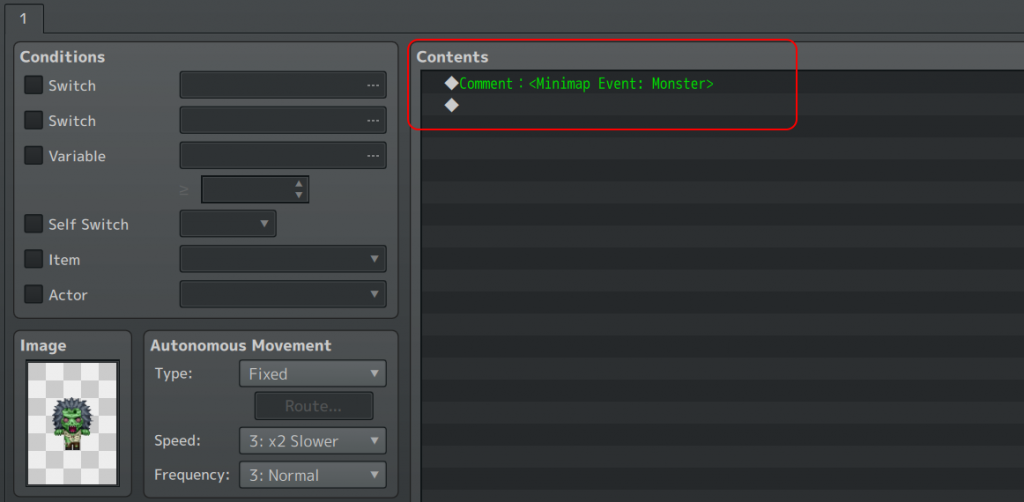
MV: Apply Template to an Event
To apply a Template to an Event:
- Open the particular Event.
- On the Event command list, add a comment.
- In this comment, write:
<Minimap Event: X>, whereas X is the Template’s name.
Example: Write<Minimap Event: blinking>to make this Event blink on the Minimap.
Note: Only the active Event page is scanned for this Tag.
Those Templates have been pre-made for you, but you can add your own, of course.
<Minimap Event: Monster>
<Minimap Event: Portal>
<Minimap Event: Weapon Smith>
<Minimap Event: Armor Shop>
<Minimap Event: Item Shop>
<Minimap Event: Inn>
<Minimap Event: Chest>
<Minimap Event: Harvestable>
<Minimap Event: Ore>
<Minimap Event: blinking>
<Minimap Event: hidden>
Mipmapping (MZ only)
This plugin supports mipmapping. By default, it chooses a factor that depends on the map’s size and uses it to programmatically scale down the tileset graphics. The downscale factor can be displayed on the Minimap when the game is started under test play conditions.
This is the default code to determine the downscale factor:
if (!$gameMap) return 1; // Escape Route

const y = Math.max(
  $gameMap.width() * $gameMap.tileWidth() / 500,
  $gameMap.height() * $gameMap.tileHeight() / 500,
);
return [1, 2, 4, 8, 12, 16]
  .find(value => y < value) || 16;
Pre-make downscaled Tileset Images (MZ only)
MZ users may pre-make downscaled image files of the tilesets when they don’t like the graphics that this plugin generates.
To add a downscaled tileset image file, follow this procedure:
- Open a Tileset File with the image editing tool of your choice
- Scale it down by a factor of, e.g., 8
- Save it in your game’s directory
/img/tilesets_8x/and keep the file name. Replace the 8 when using a different downscale factor.
Example:
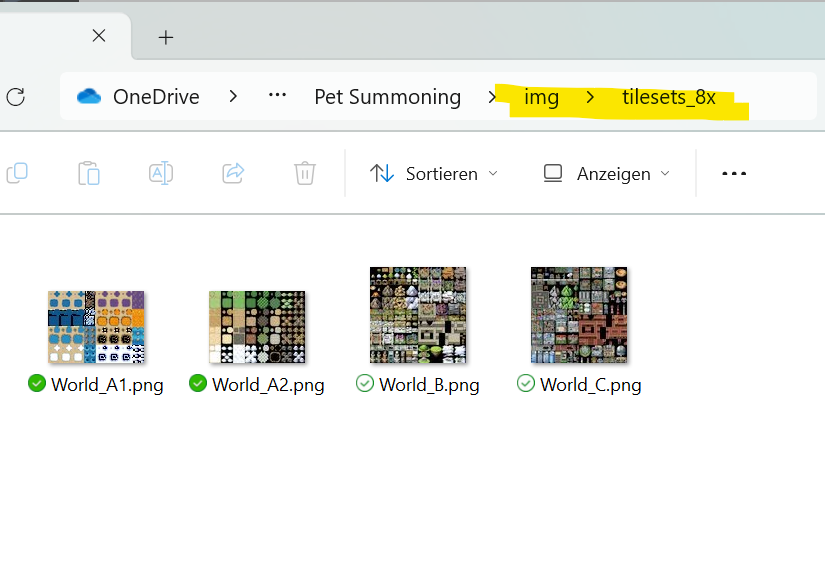
That’s it. The plugin will now scan for pre-made tileset image files.
Zoom
This feature is exclusive to the standard version of this plugin.
You can set the zoom value globally in the Plugin Parameter for both the Minimap in default mode and the Minimap in expanded mode. Using map notetags, you can temporarily use a different zoom value for the map in default mode.
These rules apply:
- A zoom value of 0.0 will show the full map regardless of its size
- A zoom value of 1.0 will show exactly what the player sees right now
- A zoom value of a number x larger than 1.0 will show x times more than the player sees right now.
Zoom Value: 0.0 (full map)
Zoom Value: 1.0
Zoom Value: 2.0
Map Notetag
<Minimap Zoom: x>Change Player’s Design
This feature is exclusive to the standard version of this plugin.
You, as the game developer, can bind an icon or picture to an actor that overrides the default representation on the Minimap. This is useful when you want a different portrait when the party leader swaps.
Add the Notetag <Minimap Icon: x> or <Minimap Picture: x> to their note box.
Plugin Parameters
Not all plugin parameters are described in this section.
Background 🠖 Design
Foreground
You can set a custom foreground. Examples:

New Map Name Window 🠖 Design
You can choose from these designs for the map name window:
Notetags
Map Notetags
The following notetags can be applied on maps:
<Minimap>Shows the Minimap on this map
<No Minimap>Hides the Minimap on this map
The following notetags are exclusive to the standard version of this plugin. They either enable or disable a certain feature:
<Minimap Parallax>
<Minimap No Parallax>
<Minimap Fog of War>
<Minimap No Fog of War>
Event Notetags (MV)
Event Notetags need to be put as comments into the Event command list. Only comments listed on the active page are scanned.

<Minimap Event: X>This Event will use Template X to render on the Minimap.
JavaScript
You may use these JavaScript functions in your eventing or plugin code:
Control Visibility
MK.Minimap.isVisible()
- returns true if the minimap is visible, false otherwise
MK.Minimap.show()
- Shows the minimap
- Remains until the next Map TransferMK.Minimap.hide()
- Hides the minimap
- Remains until the next Map TransferMK.Minimap.toggle()
- Swaps between Map is visible/hiddenForce Show
When enabled, the Minimap is shown regardless of the player’s setting in the Options Menu or any map notetag. Useful for cutscenes.
MK.Minimap.forceShow(true)
- Enable "force show"
- Remains until it is disabled by MK.Minimap.forceShow(false)
MK.Minimap.forceShow(false)
MK.Minimap.forceShow(false)
- Disable "force show"Options Menu
const b = ConfigManager.showMinimap
// true if the Minimap is enabled in the Options Menu,
// false otherwise

ConfigManager.showMinimap = true // Enable Minimap in the Options Menu
ConfigManager.showMinimap = false // Disable Minimap in the Options Menu
ConfigManager.showMinimap = !ConfigManager.showMinimap // toggle
Expand/Collapse Minimap
Not available in the Lite version.
MK.Minimap.isExpanded()
- returns true if the minimap is expanded, false otherwise

MK.Minimap.expand()
- expands the minimap

MK.Minimap.collapse()
- collapses the minimap

MK.Minimap.toggleExpand()
- swaps between being expanded/collapsed
Fog of War
Not available in the Lite version
MK.Minimap.fogOfWar.isDiscovered(x, y)
- returns true if the player has discovered the tile on position x, y

MK.Minimap.fogOfWar.isCovered(x, y)
- returns true if the player has not yet discovered the tile on position x, y

MK.Minimap.fogOfWar.revealMap()
- resolves the fog of war on this map

MK.Minimap.fogOfWar.unrevealMap()
- reestablishes the fog of war on this map

MK.Minimap.fogOfWar.forceRefresh()
- refreshes the fog of war
3rd Party Plugin Support
FAQ
Will this Plugin work with other Plugins, such as Visustella, Yanfly, …?
This plugin has been carefully designed to not cause problems with other plugins.
It has been tested with Event Spawn Systems from Visustella, Yanfly, and GALV, and it will probably work with other Event Spawn Systems, too.
To render GALV Layers on the Minimap, you will need to include a compatibility plugin. This plugin is exclusive to the paid version. Read more: Minimap 3rd Party Plugin Support
Modifications on the map’s appearance made by other plugins (e.g., Doodads, TileD), however, may not be reflected in the minimap.
Is a free trial available?
Yes.
This Plugin does not work as expected – Is a refund possible?
A refund is possible if you encounter an error or incompatibility that we cannot resolve.
Please send a message to mail@aerosys.blog.