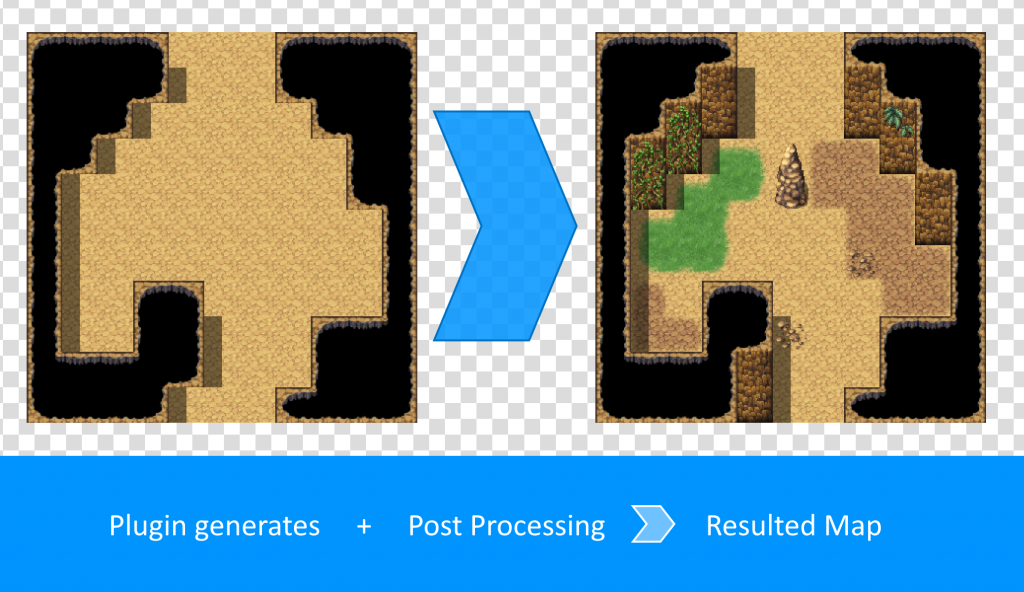
This plugin series lets algorithms generate a skeleton first and then provides a set of functions to beautify it step-by-step to get a whole map. This so-called post-processing is independent of the chosen algorithm – in other words: you can use all the features described below in combination with every map generation algorithm.
Each function tries to imitate a map designer’s work step when mapping. These steps are:
- Darker grass, dirt, …
- Events
- Large objects
- Details (e.g. plants, flowers, small rocks, …)
All actions can be done in any order, even multiple times or omitted. We go through all of them and explain how to combine them to create a fancy map.
Details
The „Details“ feature lets you design objects and also define areas where those will spawn.
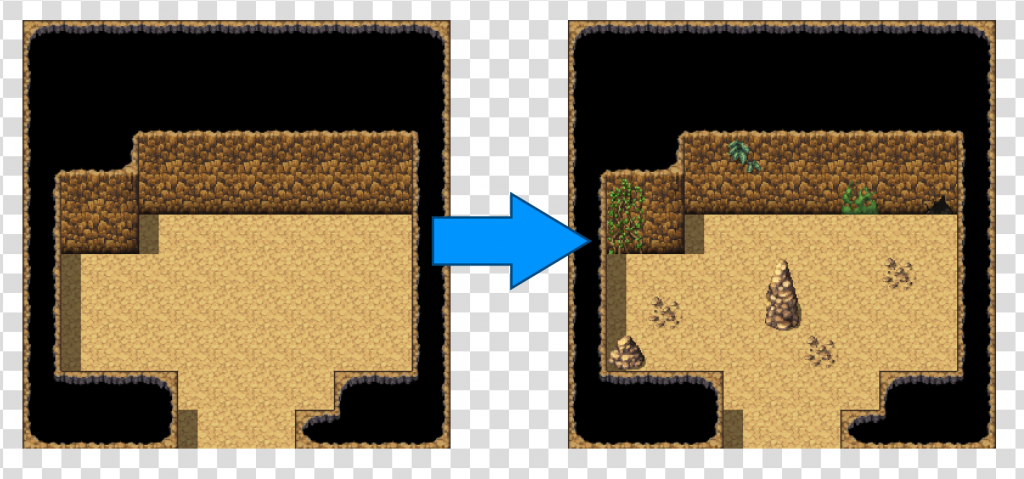
The typical „Details“ map looks like this:

For each row, the following applies: Anything that looks like the left from the blank spaces will be replaced by any object defined on the right side.
In detail, each row consists of:
- Region IDs. These define your object’s width and height.
- One or multiple „matches„. These define areas where this object can appear. A blank tile means that any tile can be here.
- Exactly one blank area that has the same width & height as the Region IDs‘ block.
- One or multiple objects
- Optional: Region ID 61
Region ID 61?
Having a 61 Stopper Tile, the generator will now include all objects on its left, regardless of whether they are blank. As a blank tile won’t modify the result, you can use this technique to draw assets by probability. Looking at this screenshot, there’s a roughly 1:3 change of an object being placed.

Assets
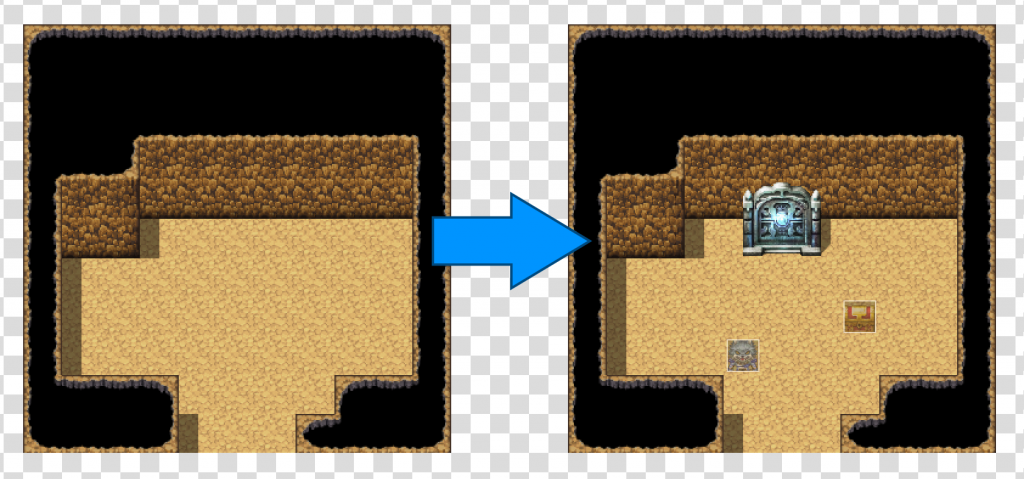
An Asset Map works almost the same as the Details Map but has some special rules. While tiles on the Details Map are drawn consistently, Assets are added x times, and therefore, they are usually used to spawn loot chests or monsters.
To create an Asset Map, create a new Map, call it „Assets“ (exactly this name), again use the same Tileset, and put it below the Space Map. Place Assets as we did before in the Structure’s Map.
Don’t use reserved Region Ids 5, 6, 13, and 61.

Shadings
Shadings are usually used to draw darker grass, dirt, or any other tile to gain more variety on the map.

Create a Map with any Name (I recommend calling it „Shadings“) and put it below the Space Map.
A Shadings Map consists of one or multiple lines containing these blocks:
- At least one Matcher
- one blank Tile
- one Tile that will be the replacement for the Tiles on the left
You can draw multiple lines to set up Rules for different biomes, e.g., grass becomes darker grass, rock floor becomes dirt, etc. However, having more than one replacement in one line is not supported.